

### Blog Post:
Fluted panel wall accent projects are exploding in popularity for home offices, offering style and measurable sound dampening in one upgrade. If you’re aiming to create a visually striking home office that lets you take calls and record with less noise, there’s a clear path—but also big pitfalls to sidestep if you want both beauty and real acoustic results.
Key Takeaways
- Fluted panel wall accents are trending for their design impact—plus real, testable improvements to sound comfort in home offices.
- Material choice, installation method, and acoustic performance (NRC/STC ratings) matter as much as the look for true sound dampening.
- DIY can save money, but avoiding crooked flutes and seam flaws—and maximizing acoustic gains—often requires pro-level prep or support.
- Why fluted panel wall accents are the 2026–25 must-have for home offices
- Materials and styles — which fluted panel is right for your room
- Acoustic performance explained — NRC, STC and what matters for home offices
- Types of sound-dampening wall panels for home office use (visual + acoustic tradeoffs)
- DIY vs professional installation — realistic cost comparison and decision guide
- Top DIY pain points — and exact fixes to prevent them
- Three high-value subtopics competitors miss (how to elevate a fluted acoustic wall)
- Sizing, layout and materials checklist for a home-office fluted feature wall
- Quick cost scenarios (3 sample budgets: budget DIY, midrange prosumer, premium pro install)
- Installation checklist, common mistakes to avoid, finishing & maintenance tips
- Recommended specs and buying checklist — what to ask vendors
- Wrap up: best next steps (choose material, test a panel, estimate cost)
- FAQ: Fluted Panel Wall Accents for Home Offices
Why fluted panel wall accents are the 2025–26 must-have for home offices
Fluted panel wall accents are taking over design-forward home office spaces, and for good reason: their vertical grooves provide high-impact texture, transforming plain walls into modern features. In 2024–2025, the global market for decorative and sound-dampening panels is growing at roughly a 3.6% CAGR, especially in North America and Europe where home offices are now permanent and acoustic comfort is in high demand (see research).
The dual appeal is clear: fluted wall panels not only look great on video calls but—when built with the right materials and backing—can noticeably improve speech clarity and reduce echo, making your office more functional. Think of it as combining the trending slat wall movement with real acoustic benefits, not just a design trend but a true practical upgrade.

Materials and styles — which fluted panel is right for your room
The material behind your fluted panel wall accent will decide its longevity, environmental impact, installation complexity, and—most importantly—how much sound it actually reduces. Here’s how the core materials compare:
- Solid wood slats: Highest finish quality, especially in walnut or oak; heavy and expensive ($14.6–$17/sq ft for 3D panels), usually require a solid substrate or furring strips, and can offer some sound diffusion.
- MDF veneer slats: Affordable with a real-wood or painted finish ($10–$14/sq ft for standard), lighter than solid wood, easier for DIY, but only sound-absorbing with proper backing.
- WPC/PVC panels: Water-resistant, often in modern grays/blacks/whites (example), budget options with simple peel-and-stick or screw-down installs; less acoustic value unless paired with dense backers.
- High-density polyester (PET) felt: The leader for true sound absorption (NRC up to 0.85), available in a wide range of colors from suppliers like PET felt; ultra-budget options at $0.49–$0.59/sq ft; recycled PET felt in the $0.76–$0.95/sq ft range is the new green standard.
Attention to backing density and thickness is critical: fluted panels with acoustic felt or high-density polyester mats behind the slats dramatically outperform bare MDF or PVC. Typical panel sizes you’ll find: 47.2″ × 23.6″ (Wayfair), 48″ × 22″ (Yuzzy), 6″ × 118″ × 1″ industry ribbed profiles.
For deep-dives on sustainable decor, check out our guide to eco-friendly home renovation ideas.
Acoustic performance explained — NRC, STC and what matters for home offices
If your home office echoes or carries too much background noise, standard decorative panels won’t solve it alone. Here’s what matters:
- NRC (Noise Reduction Coefficient): Measures how much sound a material absorbs (0 = none, 1.0 = total absorption). For speech and call clarity, higher NRC is ideal.
- STC (Sound Transmission Class): Rates sound blocking (how much noise passes through the wall). STC is less critical for interior accent walls but worth noting if you share a wall with noisy spaces.
High-density polyester panels can reach NRC 0.85, versus typical wood slat fluted panels with STC around 30–35.
Backing and cavity depth behind your panels also push results: panels mounted over felt, rigid board, or with a 1″ air gap handle more frequencies, especially in the voice range.
See more sound-blocking tips in our post about blackout curtains for bedrooms (the same acoustic principles apply).
Types of sound-dampening wall panels for home office use (visual + acoustic tradeoffs)
There’s now a panel type for every priority:
- Decorative wood slat panels with acoustic backing: The ‘look’ everyone wants with hidden felt/polyster mats for absorption. Good for conference calls and as a video backdrop. See market leaders like Wayfair or Yuzzy for reference sizing.
- Polyester fiber acoustic panels with fluted facades: Best for podcasters and creators—lightweight, higher NRC, sometimes modular for frequency-targeting.
- Rigid PET felt fluted panels: Sustainable, high-absorption and now available in earth tones and bold colors—good for gamers, smaller phone booth setups.
- Closed-cell foam panels: Very budget-friendly but with limited finish options; ideal behind a desk or in utility rooms.
The industry is shifting toward ready-to-install, sustainable options—especially recycled PET panels and wood slat styles tailored for “prosumers”. Modular insert systems are trending now, giving designers more flexibility.
See more ways to block noise in your workspace in our article on garage storage system upgrades (acoustic panels can also quiet loud garages).
DIY vs professional installation — realistic cost comparison and decision guide
Here’s what most DIYers and pros are really spending, using 2024–2025 price trends (source):
| Scenario | Material Cost (panel) | Fastener/Adhesive | Labor (per panel) | Total Cost (per panel) |
|---|---|---|---|---|
| DIY fluted wood panels | $10–$14 | $5–$10 | $0 | $15–$24 |
| Professional install | $10–$14 | $5–$10 | $40–$120 | $55–$135 |
| Polyester foam (DIY) | $0.49–$0.59 (per sq ft) | Negligible | $0 | Budget (<$10/sheet) |
| Recycled PET felt (DIY) | $0.76–$0.95 (per sq ft) | Negligible | $0 | Budget (<$20–$30 for a small wall) |
DIY works if you’re just tackling a single accent wall, are comfortable with precise leveling and don’t mind a little touch-up. Hire a pro for tricky layouts (full rooms, integrated lighting, obstacles) or if finish quality must be perfect.
Top DIY pain points — and exact fixes to prevent them
Most reported project “fails” come from these three pain points, which you can fix with planning and the right tools:
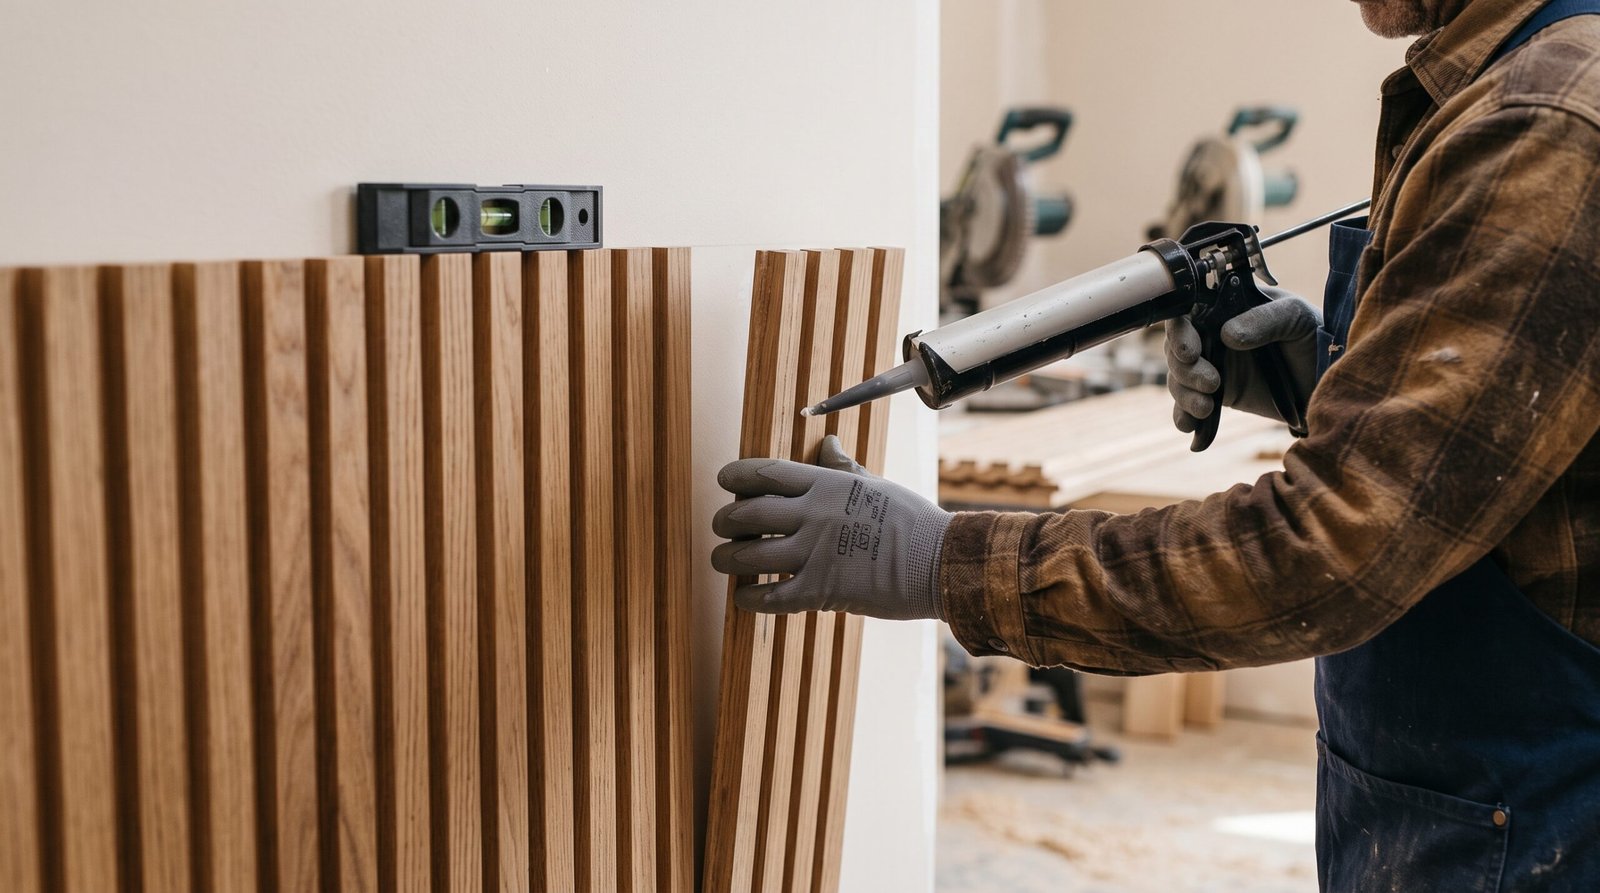
- Getting flawless, straight flutes: Mark your start point with a laser or chalk line. Use spacers. Start with a “test fit” dry run of a few panels before any glue or brad nailer.
- Disappointing sound dampening: Many value panels (especially MDF, PVC) lack dense backing. Add a layer of high-density polyester behind the panel or mount on acoustic foam—especially at ear level for calls and where sound reflects most.
- Visible seams and edges: Use paintable caulk or filler between panel joins, sand lightly after drying, and touch up with matching stain or latex finish. Never skip this step on rooms with natural light; shallow seams show up badly on video calls.

For even more pro techniques, see our tutorial on DIY cabinet refacing; the alignment and hidden seam tricks are surprisingly similar.
Three high-value subtopics competitors miss (how to elevate a fluted acoustic wall)
- Integrated LED channels/lighting: Add indirect lighting behind or between flutes using low-profile LED channels. This not only upgrades the look but also enhances texture on video calls. Source stick-on LED strips that fit between MDF or PET slats for an instant light feature.
- Modular NRC-rated insert systems: Some high-end fluted panels let you swap in felt inserts tuned for different frequencies. This means you can boost absorption in the speech range or for gaming. Look for “modular acoustics” or “replaceable felt slots” in product descriptions.
- Sustainability credentials: Ask for recycled content (% by weight) and third-party low-VOC certification before buying. Greenest PET panels now list GREENGUARD or LEED points, and some wood panels use FSC-certified veneer.
Most online guides skip these—but they’re what separate a basic accent wall from a feature wall tailored to creative or professional use.
Sizing, layout and materials checklist for a home-office fluted feature wall
Here’s how to map your project without costly mistakes:
- Panel sizes: Common options include 47.2″ × 23.6″ (Wayfair), 48″ × 22″ (Yuzzy), and for tall or custom applications, 6″ × 118″ × 1″ ribbed slabs.
- Layout rules: Start at the most visible wall edge and work across. Stagger panel seams at least 12″ between rows for a premium/architectural look. Plan for full coverage plus 5–10% extra for cutting waste.
- Acoustic backing: Use high-density polyester or PET felt behind panels in video/call zones.
- Tools/materials: Level, tape measure, laser, hand or miter saw, strong construction adhesive or brad nailer, fillers, sanding tools, paint/stain (if required), spacers.
If you’re tackling a small wall, see our popular guide for budget-friendly wall upgrades—the planning checklist transfers well.
Quick cost scenarios (3 sample budgets: budget DIY, midrange prosumer, premium pro install)
Let’s price out an 8’ × 10’ fluted panel wall accent (80 sq ft):
| Scenario | Panel Material | Panel Cost | Install Type | Total Cost Estimate |
|---|---|---|---|---|
| Budget DIY | Polyester foam or PET felt | $0.49–$0.95/sq ft ($39–$76 for 80 sq ft) | DIY | $60–$120 (with glue, filler, tools) |
| Prosumer | Standard MDF/veneer fluted panels | $10–$14/sq ft ($800–$1,120 for 80 sq ft) | DIY | $840–$1,200 (with supplies) |
| Premium Pro | High-end solid wood 3D fluted | $14.6–$17/sq ft ($1,168–$1,360 for 80 sq ft) | Professional labor ($40–$120/panel) | $1,400–$2,600+ all-in* |
*Note: Professional setups often include extras like custom trim, lighting, or built-in shelving.
For more cost breakdowns by room size, check our window replacement cost guide—materials and labor logic is similar.
Installation checklist, common mistakes to avoid, finishing & maintenance tips
- Prep wall: Clean/dust. Check for protruding nails and fill holes.
- Find your start line: Mark vertical with a level or laser, not by eye.
- Dry-fit panels: Lay out a test row. Cut panels with a sharp saw for no tear-out.
- Apply adhesive: Use beads for proper grip, or tack with brad nails if heavy.
- Set panels gently: Check with a spacer or template for flute consistency.
- Treat seams: Apply caulk/filler, let dry, sand smooth, touch-up finish or stain.
- Maintenance: Dust slats monthly. Spot-clean with a soft brush or microfiber. Check for gaps yearly and re-seal seams as needed.
Skipping alignment, backing, or seam finishing is the biggest source of user frustration—follow these steps and reference our peel and stick backsplash guide for parallel tips on alignment and easy updates.
Recommended specs and buying checklist — what to ask vendors
- What are the panel dimensions and thickness? (Match to your wall size and design goals.)
- Is there acoustic backing integrated? Ask for NRC and STC test data; aim for NRC >0.7 / STC 30+ if acoustic comfort is a priority.
- What’s the core material—solid wood, MDF, PET felt, or composite?
- Are there recycled content and low-VOC certifications? Request documentation to support eco claims.
- Is an installation guide included? What warranty and support is offered?
Target specs for home office acoustic use: NRC about 0.85 for high-density PET; STC 30–35 for wood/MDF panels.
Wrap up: best next steps (choose material, test a panel, estimate cost)
Start by choosing your preferred fluted panel wall accent material—balance finish style, cost, and the level of sound dampening needed for your workflow. Order a single sample panel and request the NRC (acoustic spec sheet) before committing to a full wall. Compare DIY vs pro installation costs with the sample in hand. If you’re planning to elevate your setup in the future, consider modular inserts or an LED channel now for flexibility. The 2024–2025 market is clearly moving to ready-to-install wood slat and PET felt panels as more home professionals and creators demand a blend of performance and design.

FAQ: Fluted Panel Wall Accents for Home Offices
Will fluted panel wall accents really make my office quieter for calls or podcasting?
Yes—if you choose panels with dense backing (like high-density PET or felt) and install them over acoustic insulation or an air gap. Decorative-only panels with no backing may not deliver noticeable sound dampening.
Can I install a fluted panel wall accent myself, or do I need a professional?
If you have basic DIY skills (using a level, saw, adhesive), you can tackle a single accent wall. For larger rooms, lighting integration, or perfect seams, hiring a pro is advised for flawless results.
How do I hide seams between fluted panels?
Apply a paintable caulk or wood filler between the panels after installation. Let it dry, sand flush with the slats, then touch up with paint or finish for a seamless look.
What’s the maintenance routine for acoustic fluted walls?
Dust monthly with a soft brush or microfiber duster. Avoid strong cleaners—spot clean stains. Once a year, check for gaps or loose seams and touch up as needed.
Are recycled PET felt panels as durable and effective as wood options?
For acoustic performance, high-density PET felt panels can outperform wood. They’re also highly durable and eco-friendly. The biggest difference is appearance and texture—wood is a premium look, felt is softer and modern.
—